2014-07-21

Homemade Phonescoping Adapter

Many of my previous posts dealt with digiscoping adapters for compact digital cameras and spotting scopes, but what if you don't have one of those three ingredients with you? You're more likely to have your smartphone and binoculars with you when birding, so here's how to make your own smartphone digiscoping adapter. Is it still called digiscoping? I guess it's called phonescoping.

What you need:

A case that fits the back of your phone.

Self-adhesive hook and loop fastener ("Velcro"). I found some 5 cm (2 in.) wide at Amazon. Try to get the widest and strongest you can find.

A 35mm film container or similar item that will fit snugly inside the eyecup or outside the ocular of your binoculars, here my trusty old Swarovski Habicht 7x42s. I saved a bunch of film containers when digital cameras arrived on the scene, but you can still find them online, e.g. at eBay.

Use a jar lid or similar item as a template to mark the back of the soft side ("loop" part) of the hook and loop tape. You want it to be 6 or 7 cm (2.5 to 3 in.) wide in order to accommodate several sizes of adapters. Cut along your marking.

Now use your smartphone case as a template to mark the hole in the middle. Then cut it out.

Take the backing off the tape, and press it firmly onto the phone case, centering the holes. Cut off the excess.

You will want to weigh the tape down with a stack of books overnight in order to create a stronger bond.

Now do the same thing with the hook part of the hook and loop tape, this time using the film container as a template. Cut a hole in the middle that's as big as the hole in your phone case. I used a 14mm (6/16 in.) drill bit. Then cut off as much of the rest of the film container to get your phone as close as possible to the binoculars (to avoid vignetting). I used my trusty table saw. Here's the result:

The surface area looks pretty small, but it works surprisingly well. Now insert your phone into the case, and stick your new adapter onto it.

Now insert this into the eyepiece of your binoculars.

And fire up your favorite camera app (or just the one that came with the phone).

Now point the whole thing at a bird (this one's hiding in the foliage).

As you can see, depending on how snugly the adapter fits into the eyepiece, one hand is free to zoom in (getting rid of the vignetting) and snap the photo.

This contraption also fits into the eyepiece of this newer model Swarovski SLC.

Here are a few photos taken with this setup:


If your new adapter doesn't fit into your eyepiece (here on a Swarovski CL) you can screw in the eyepiece where the adapter is and rest your phone on the other eyepiece.

With this setup you need both hands to hold the phone and adapter to the binoculars, making it hard to operate your camera app.

However, there are camera apps that react to your voice. You can take a picture, for example, by saying "take the picture"!

This can all be very tricky, however, so here's how I made an adapter to fit this model:

A friend had an old plastic vacuum cleaner nozzle that tapered slightly from one end to the other:

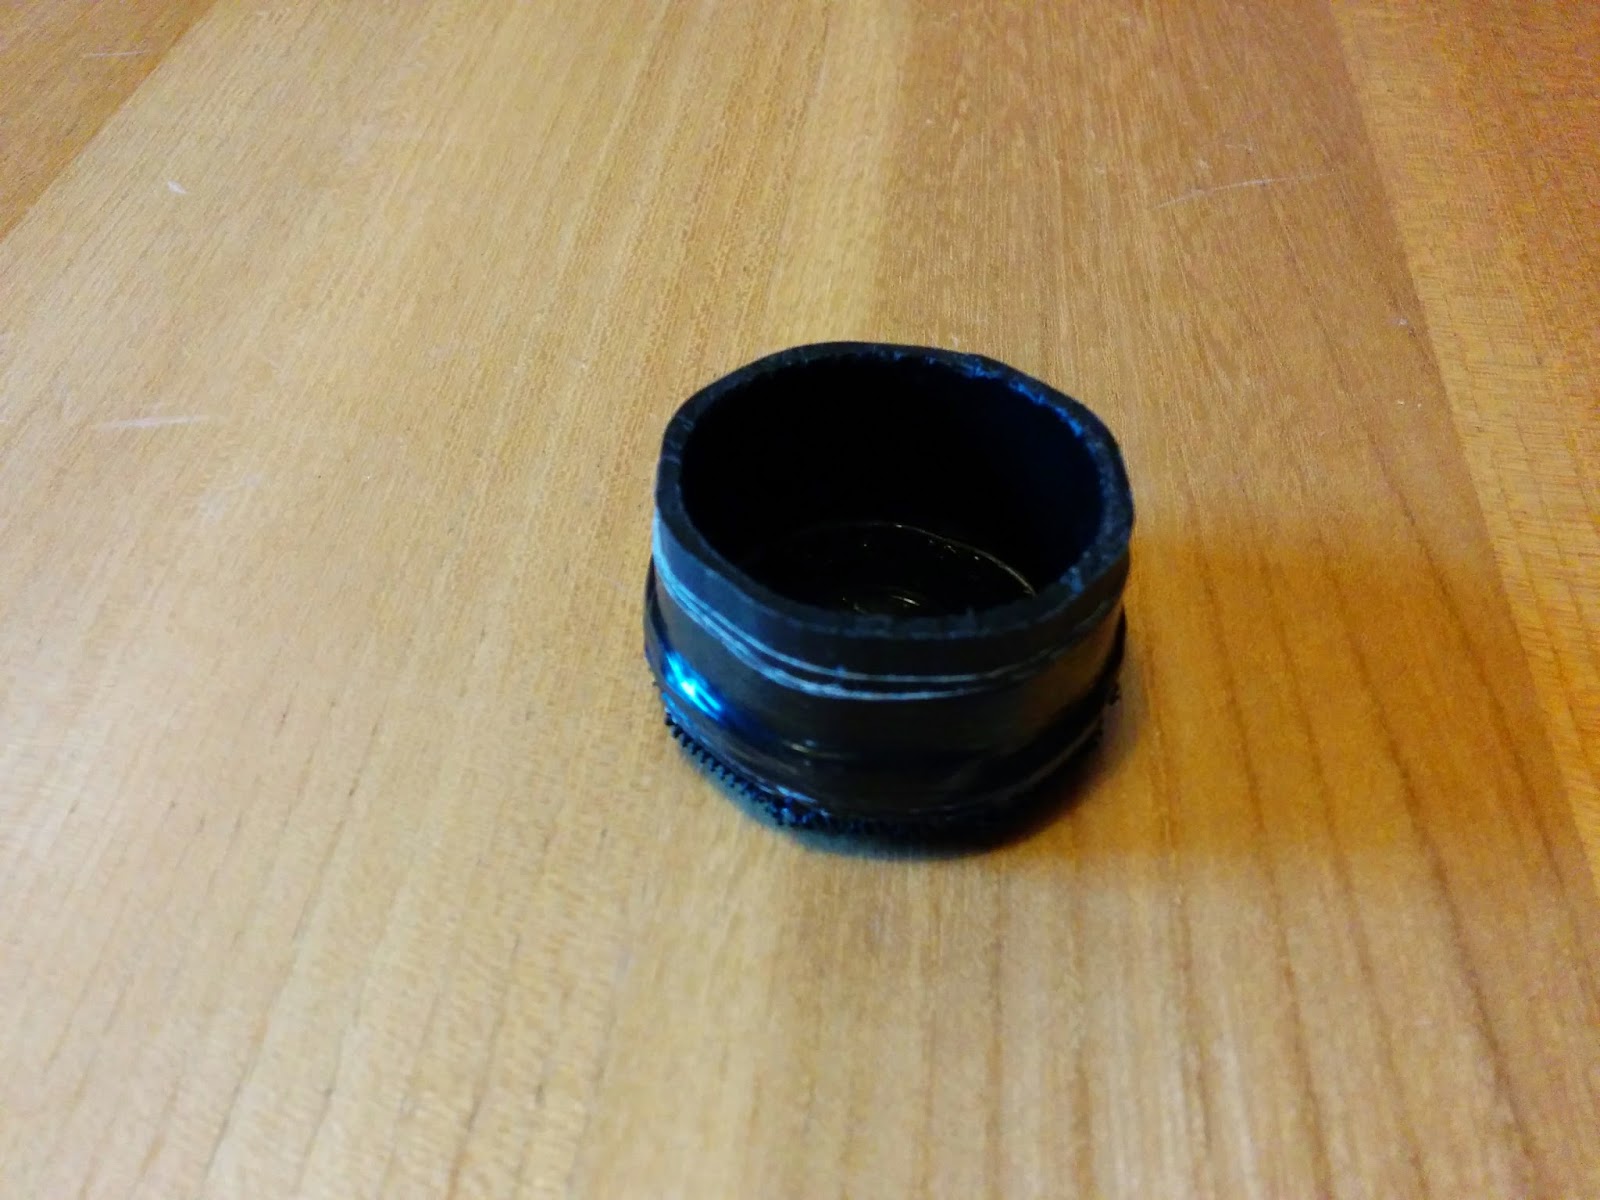
I cut off slices about 2 cm (1 in.) thick till I had a ring that fit snugly over the ocular:

Then I got a hole saw that would cut a circular piece of an old CD-ROM to fit exactly inside the plastic ring. First I pre-drilled a hole in a scrap of wood and clamped the CD-ROM centered on the drill hole:

This is the result of drilling the disc:

I had to cut off some extraneous plastic and flash with a Stanley knife to make the disc fit inside the ring. Then I cut off a piece of the hook and loop tape and stuck the ring on it:

Then I put the disc inside this:

Then I cut off the corners of the tape:

Then I made a few more snips to create some tabs:

Then I folded the tabs up and stuck them to the ring:

Then I taped some duct tape around the ring:

Then I cut a hole in the bottom of the hook and loop tape as large as the hole in the disc:

Done:

A couple photos from this new contraption:


None of these pictures will win prizes in a print publication of course, but if that's what you wanted, you wouldn't be using a smartphone. However, they're perfectly good for documentation purposes and for posting on your favorite social media site.

2014-03-15

Testing the Swarovski ATX Spotting Scope

Swarovski's modular spotting scope system ATX/STX allows you to interchange 3 sizes of objective lenses with one ocular.

The oculars are also available in angled (ATX) or straight (STX) versions.

The objective sizes are 65 mm (25 to 60 power zoom), 85 mm (also 25 to 60 power) and 95 mm (with a whopping 30 to 70 power zoom).

The objectives have the further advantage of having the zoom ring right next to the focus ring of the ocular... no more fumbling between the two when focussing and zooming on a distant subject.

65 mm objective and ATX ocular separate
65 mm objective and ATX ocular connected

I have been testing the ATX for several months with the 65 and 85 mm objectives.

65 mm and 85 mm objective comparison

My main focuses are identification, observation and digiscoping with a compact digital camera (both photos and videos). For this I've been using the DCB II digiscoping adapter.

65 mm objective with ATX ocular, DCB II and camera separate
65 mm objective with ATX ocular, DCB II and camera separate

65 mm objective with ATX ocular, DCB II and camera connected together and ready
65 mm objective with ATX ocular, DCB II and camera connected together and ready

The great advantage of this adapter is that you can easily fold it up out of the way to view through the scope.

65 mm objective with ATX ocular, DCB II and camera folded up
65 mm objective with ATX ocular, DCB II and camera folded up

Once you've attached the adapter, there's really no reason to ever take it off again even if you switch objectives. I walk around all day with this setup (plus tripod) on my shoulders. The only reason to take the camera off the adapter is when the battery runs down and you change to a freshly charged one.

The advantage of a larger 85 mm (and 95 mm) objective lens, of course, is to allow more light to reach the eye under suboptimal lighting conditions. The 65 mm lens is so good, however, that for me the advantages of lighter weight and less volume mean that I usually leave the 85 mm lens at home before leaving on my hours-long treks, often in mountainous terrain. The 85 mm objective lens alone (without the ocular) weighs 1.15 kg (2.53 lb.) compared to 0.84 kg (1.85 lb.) for the 65 mm lens, a difference of 0.31 kg (0.68 lb.).

With practice changing the objectives is easy, but since this is the part that attaches to the tripod, you have to change two attachments every time (the attachment to the tripod and the attachment to the ocular). Therefore, unless the lighting conditions are really bad and I won't be walking around too much, I would stick with the 65 mm lens. Your mileage may vary.

Another piece of optional equipment is the balance rail, the reasoning behind which is that the added weight of the camera will make the ocular end of the scope heavier, causing that end to tip down.

85 mm objective with ATX ocular and balance rail separate
85 mm objective with ATX ocular and balance rail separate

85 mm objective with ATX ocular and balance rail connected
85 mm objective with ATX ocular and balance rail connected

In the photos the foot on the balance rail is closer to your body (and the camera) than the foot on the scope. With a push of the green button on the balance rail you can easily slide the center of balance to any desired position.

The balance rail fits both the 65 mm and 85 mm (and presumably 95 mm) lens, but not without considerable fiddling. This is not meant to be done in the field.

The balance rail is much more sophisticated than in the ATM system. Swarovski obviously put a lot of thought into it, but it adds 0.34 kg (0.75 lb.) to the system. At first I thought the problem of the camera tipping down when you least expect it would be larger. Admittedly I've gotten into the unconscious habit of tightening the corresponding knob on the tripod before taking my hands off the positioning handle. And with compact digital cameras becoming more and more compact and lightweight, this is becoming less and less a problem.

The tripod head I tested with this system was a DH 101 and the tripod was a CT 101, the same as in this blog post, so I won't go into further detail.

As you can see the Swarovski ATX/STX spotting scope system is truly modular to fit any need.

In summary the system I usually use consists of:
  • Swarovski 25-60x 65mm spotting scope objective
  • ATX ocular
  • DCB II digital camera base
  • CT 101 carbon tripod
  • DH 101 tripod head
  • Nikon Coolpix P310 compact digital camera

The total weight of this system is about 4.5 kg or 10 lb. as measured by my luggage scale, about the same as my previous system.

For photos made with this system see my previous post and my Flickr Photostream. For videos, see my YouTube wildlife playlist.

German-language version of this post